Calling the API from the website
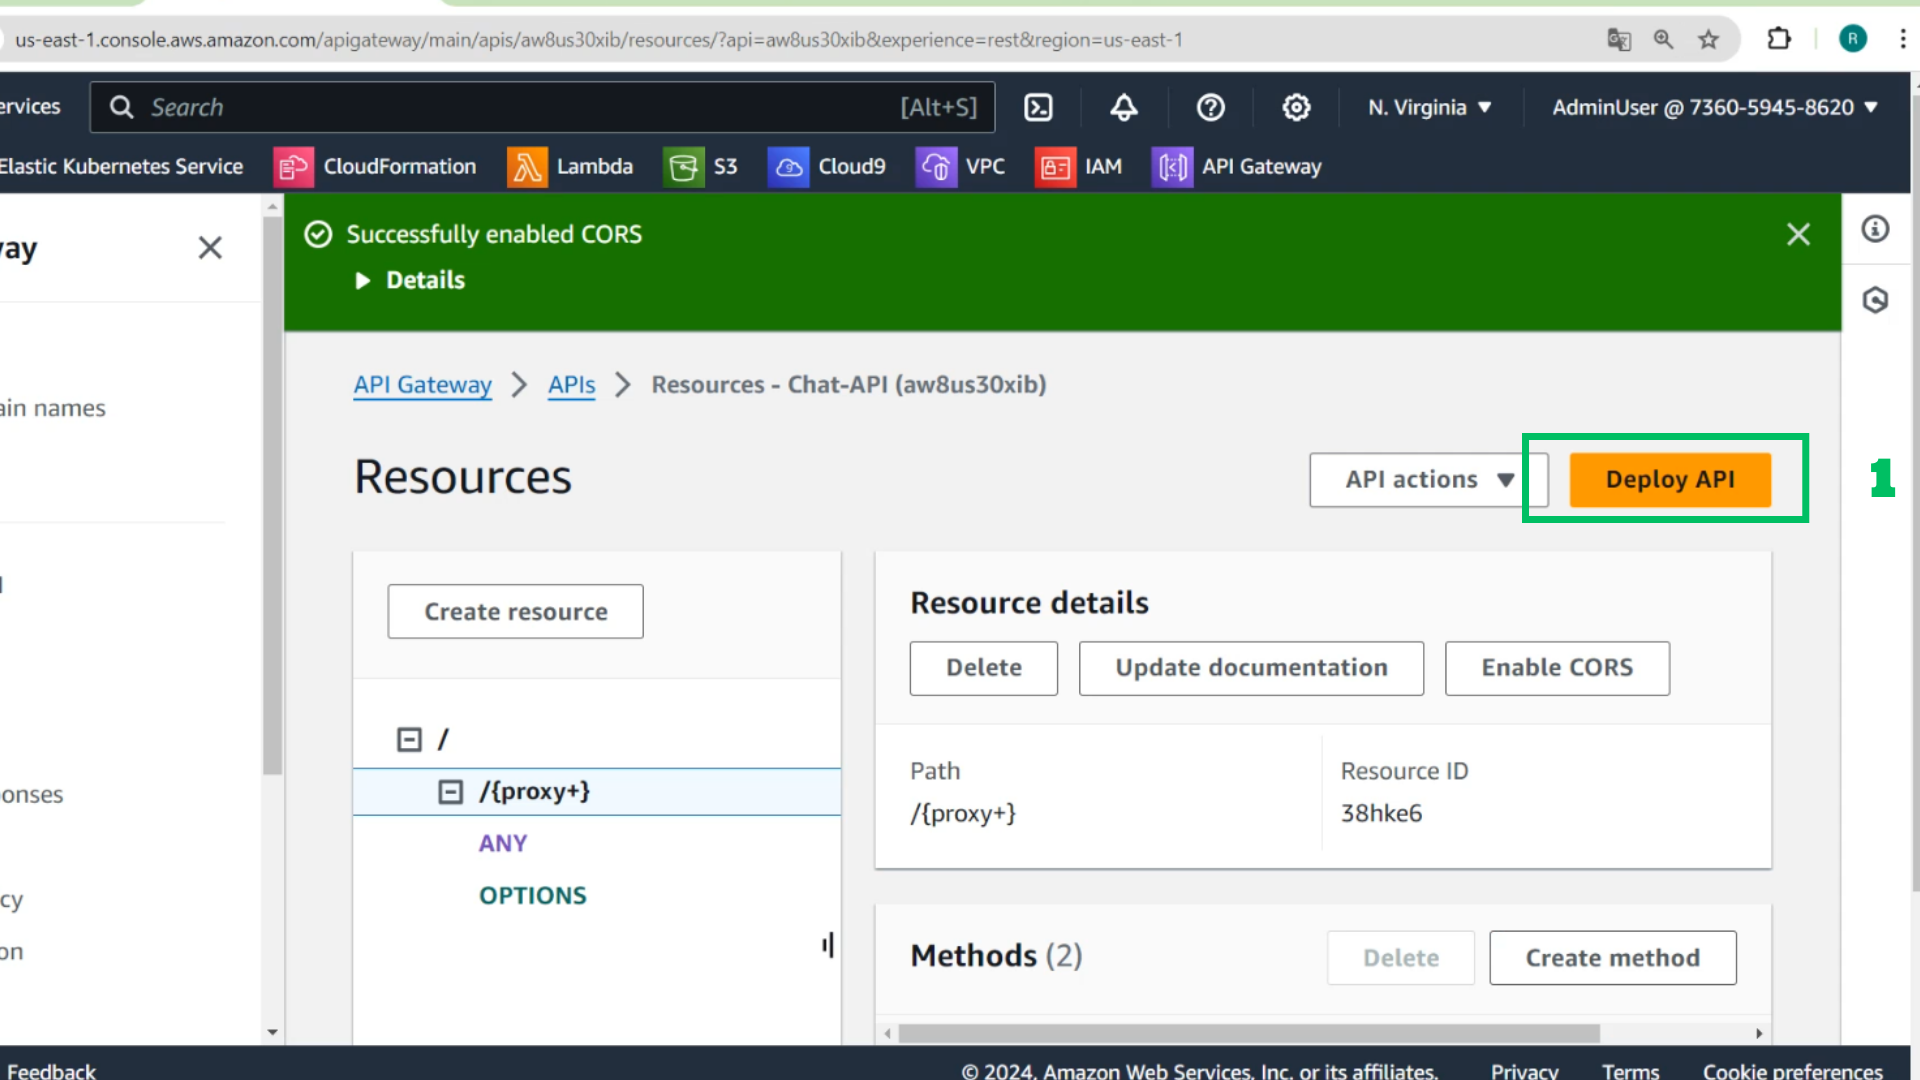
- Choose Deploy API
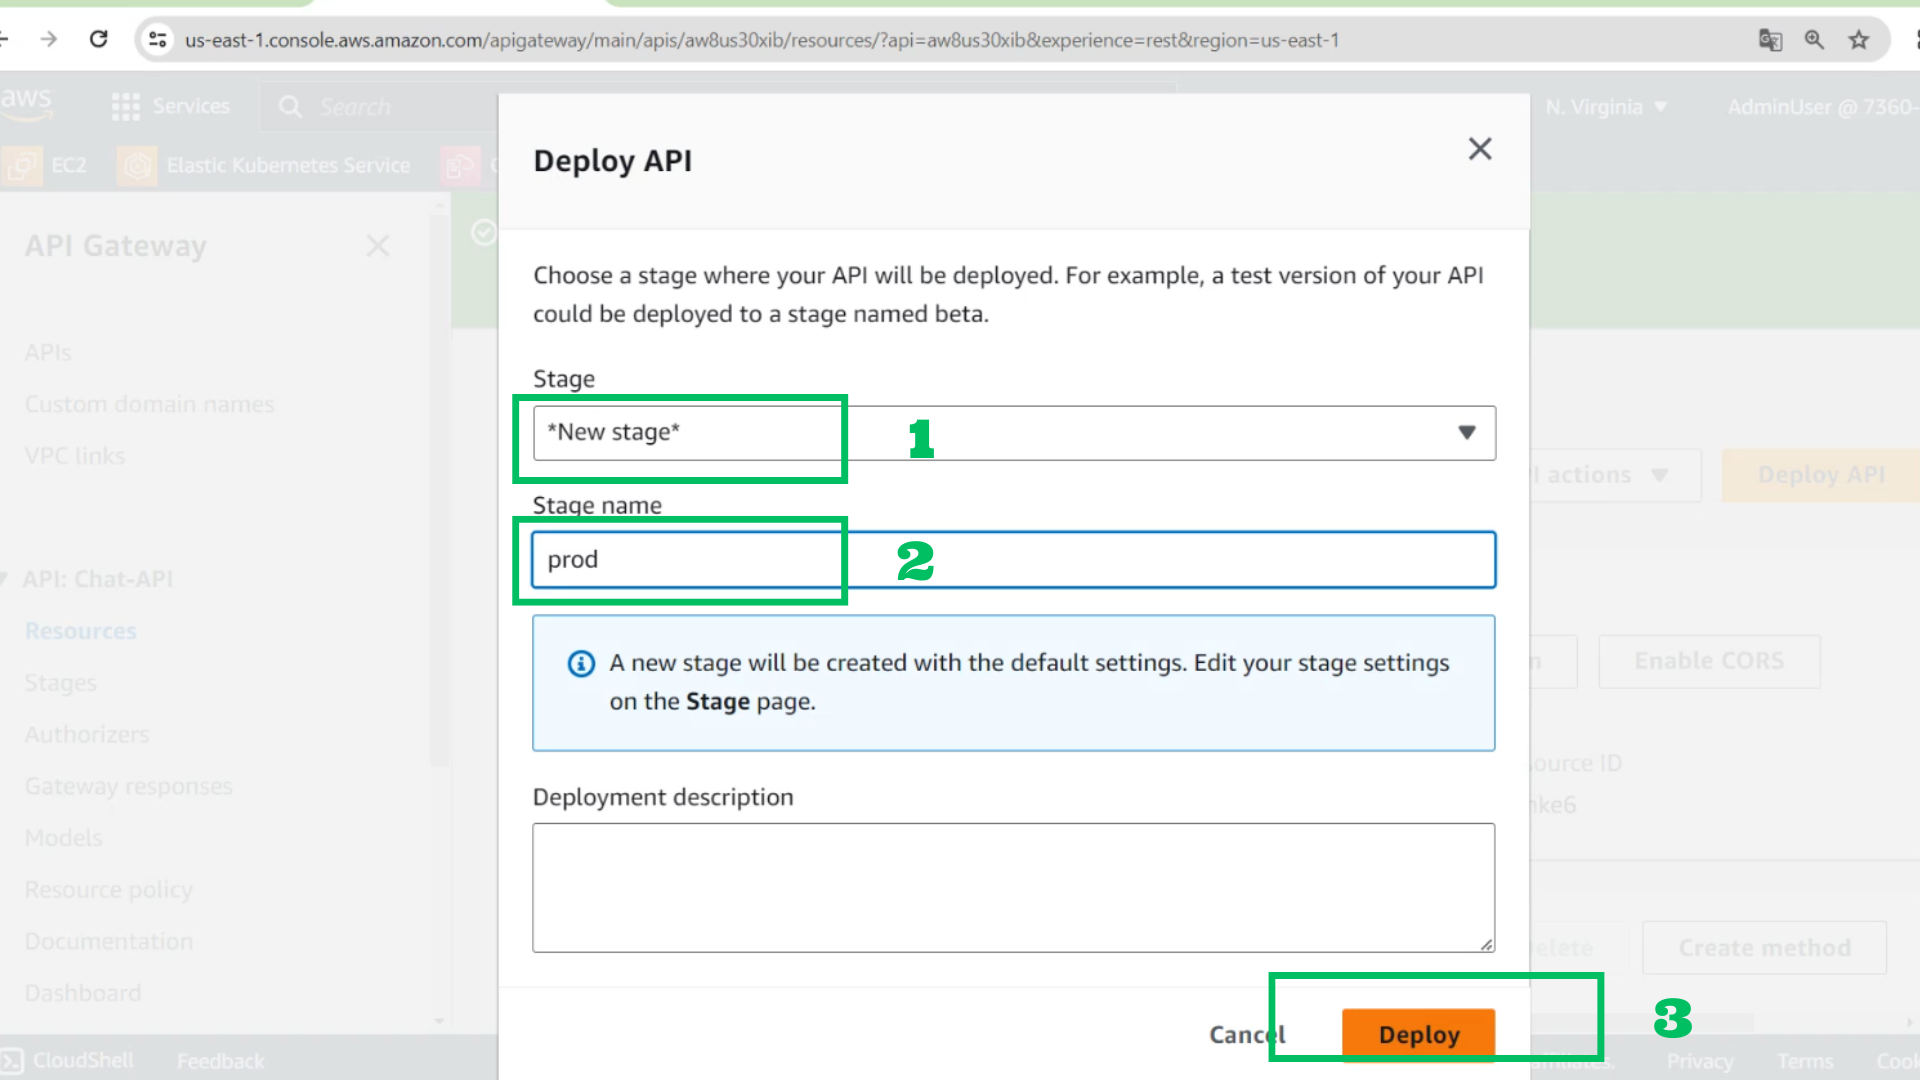
- At the Deploy API interface
- Stage: New stage
- Stage name: prod
- Choose Deploy
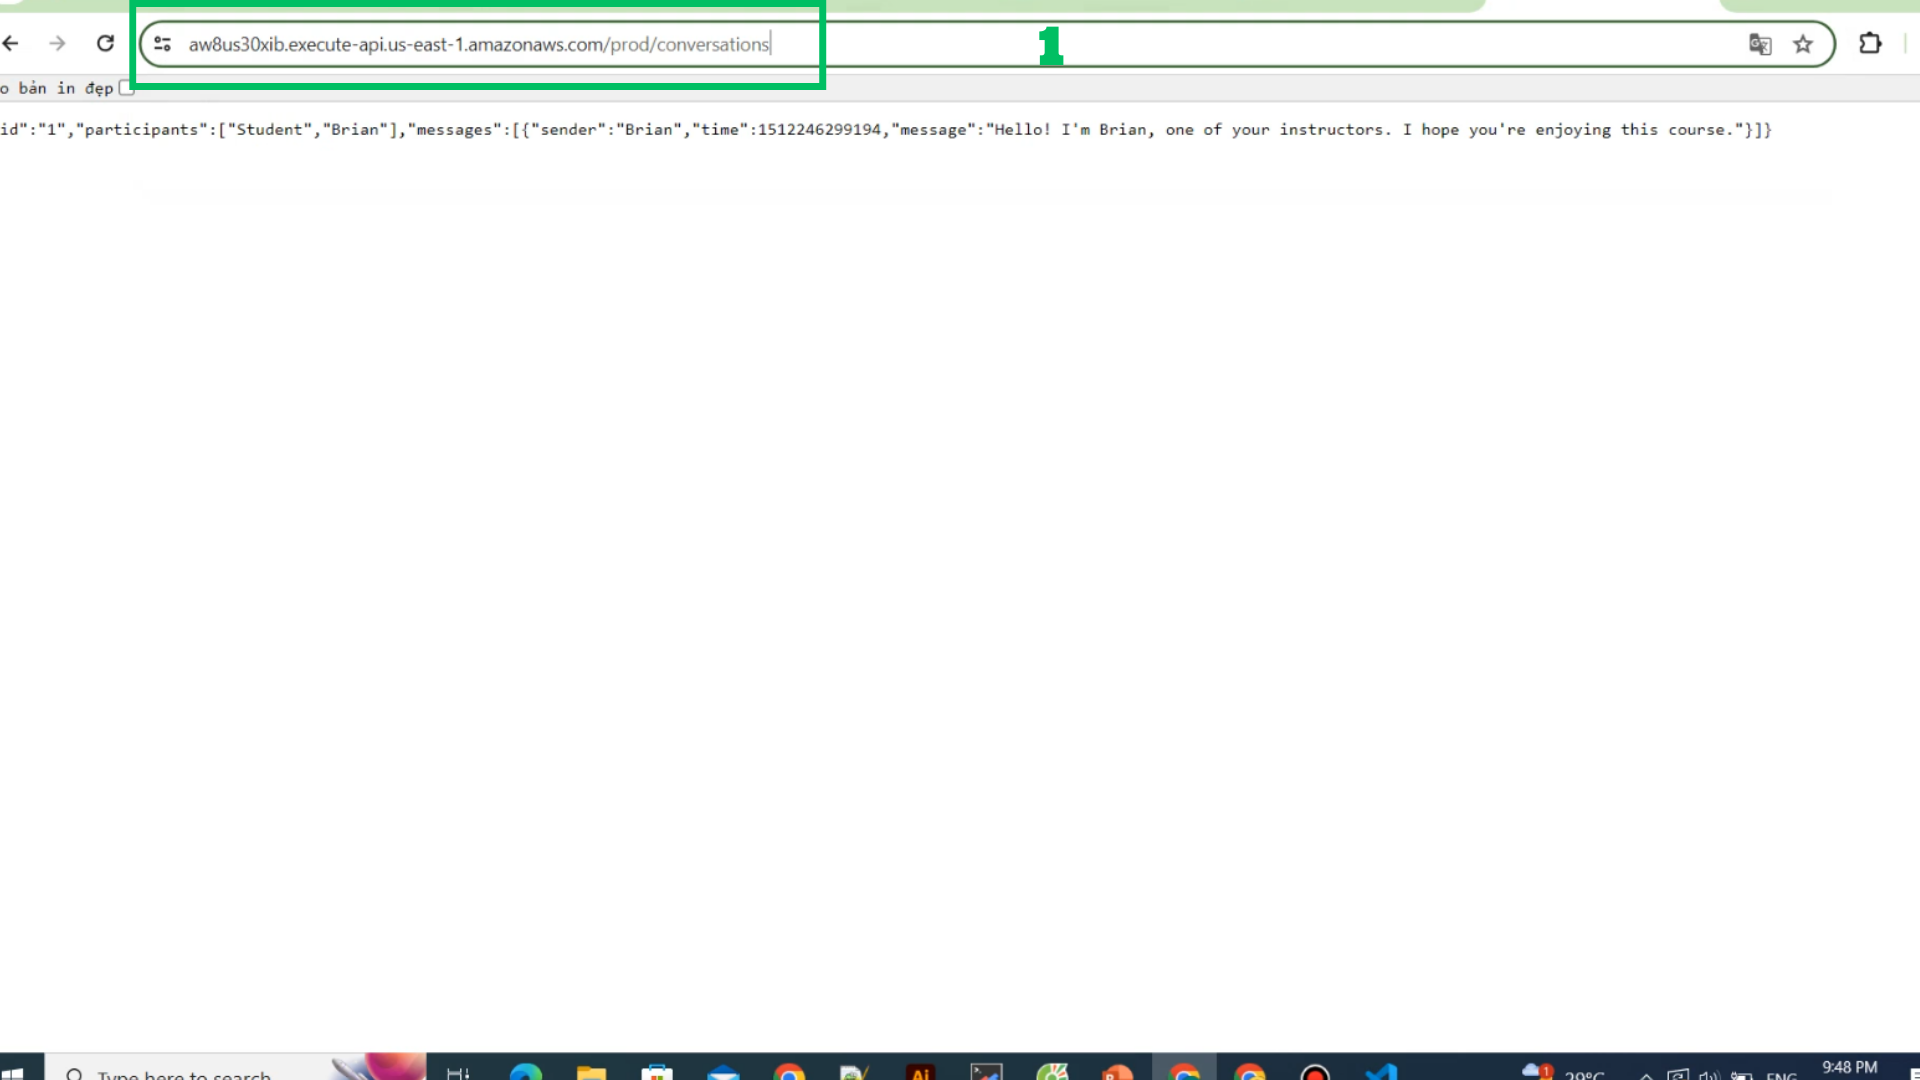
- Copy Invoke URL
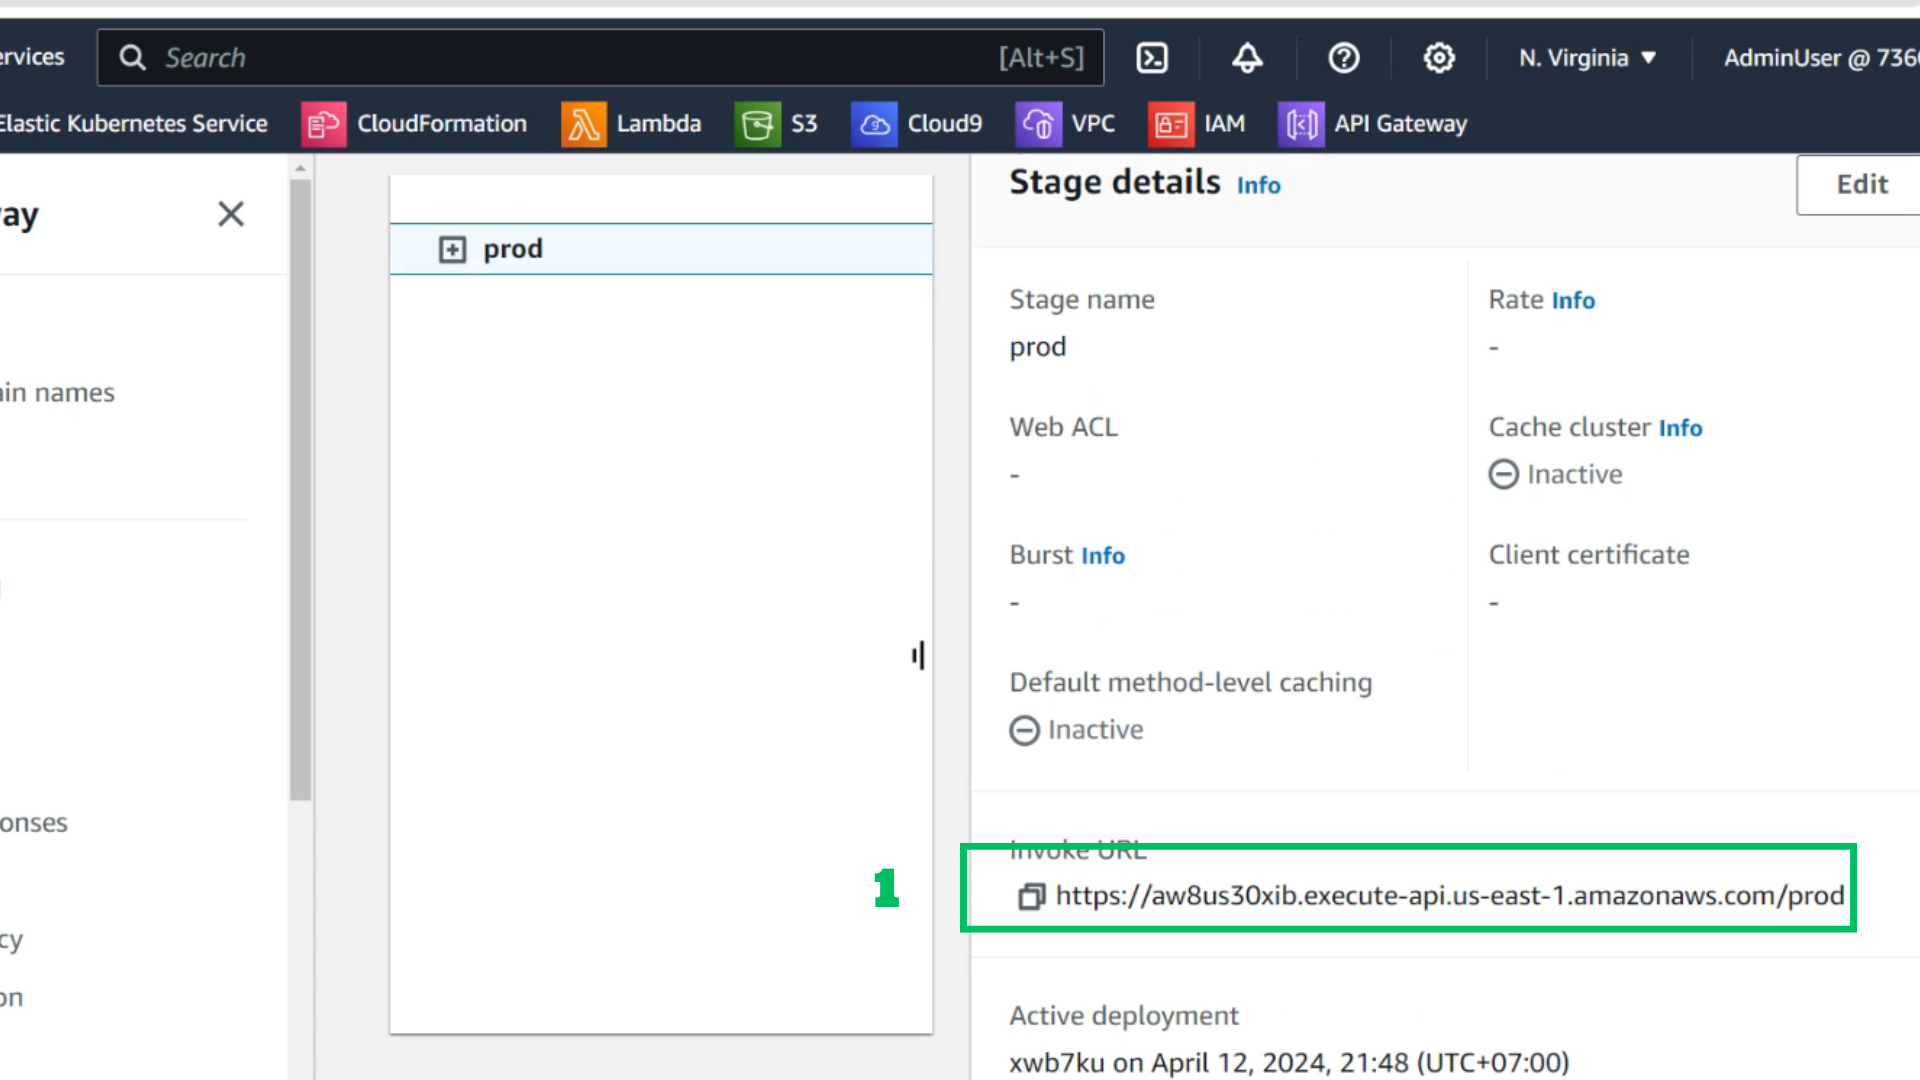
- Paste the URL into the browser and see the results
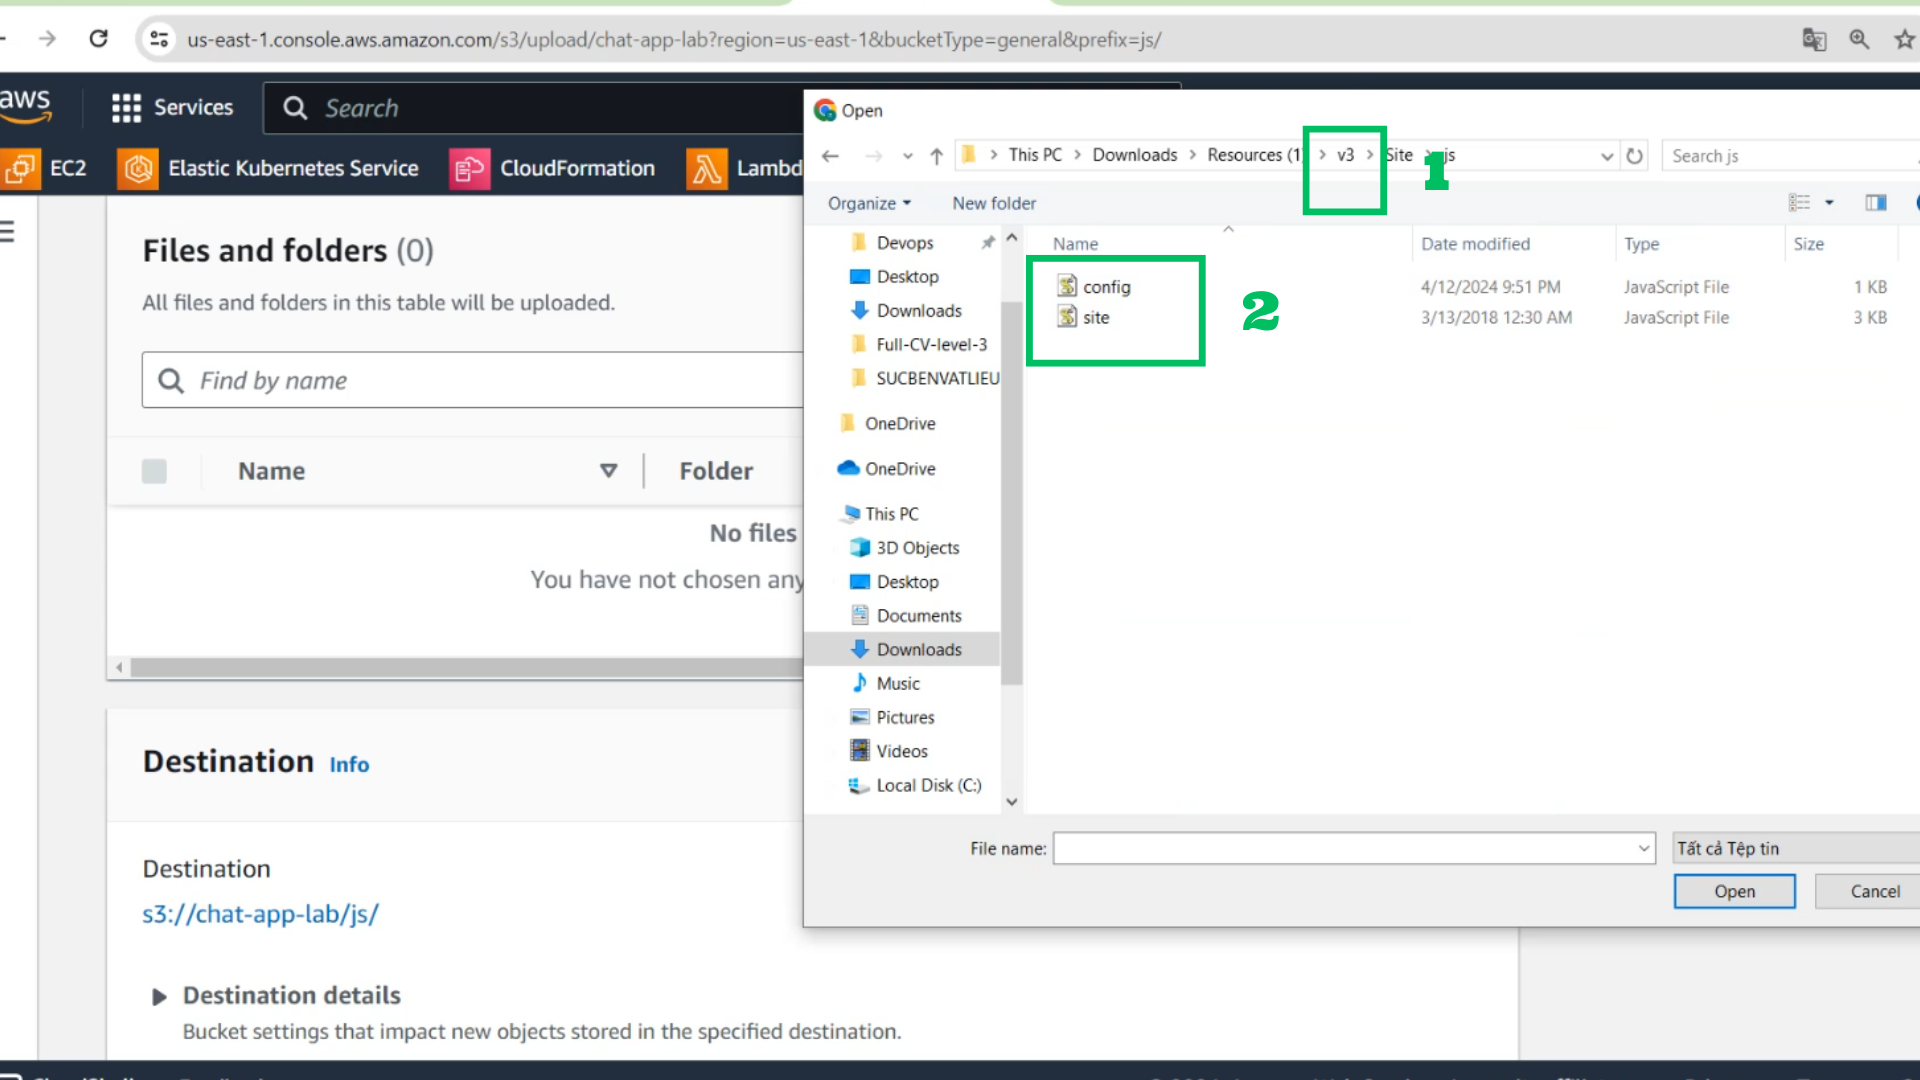
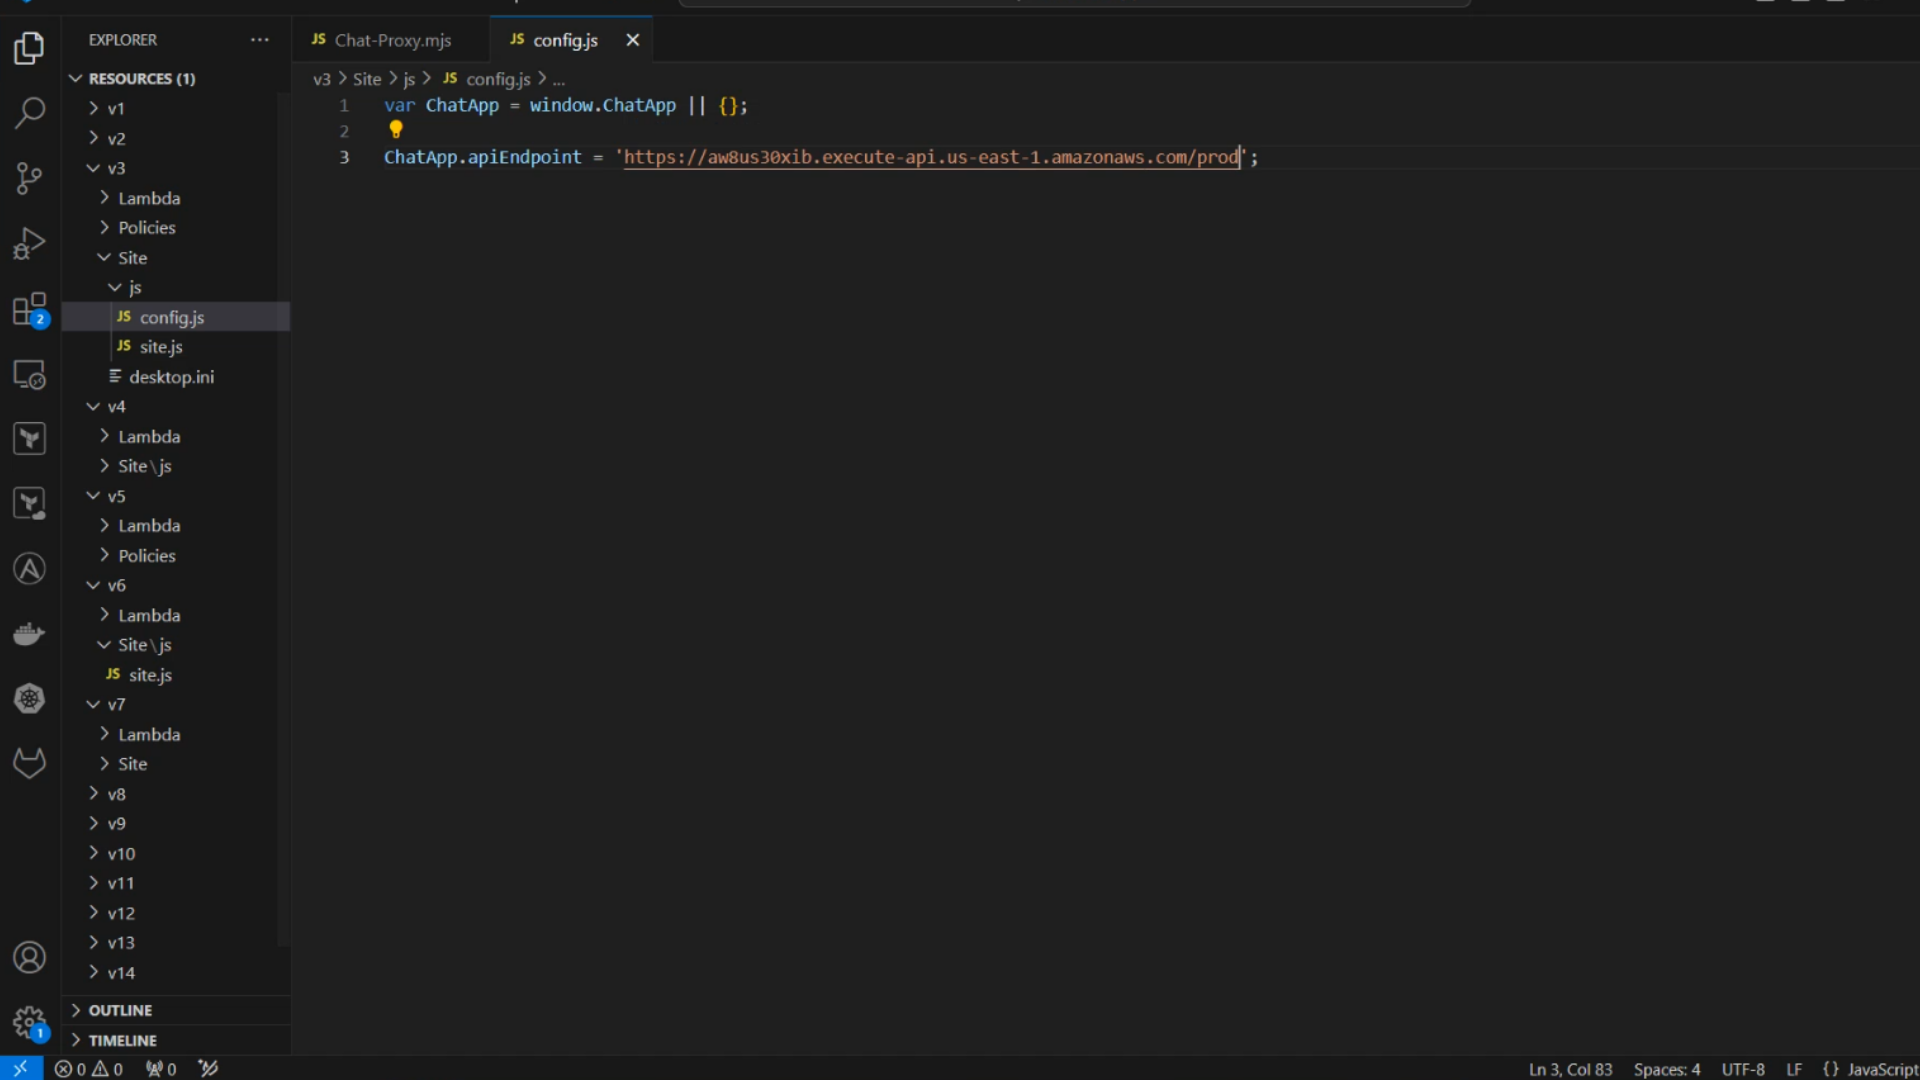
- Paste the URL into the configuration file
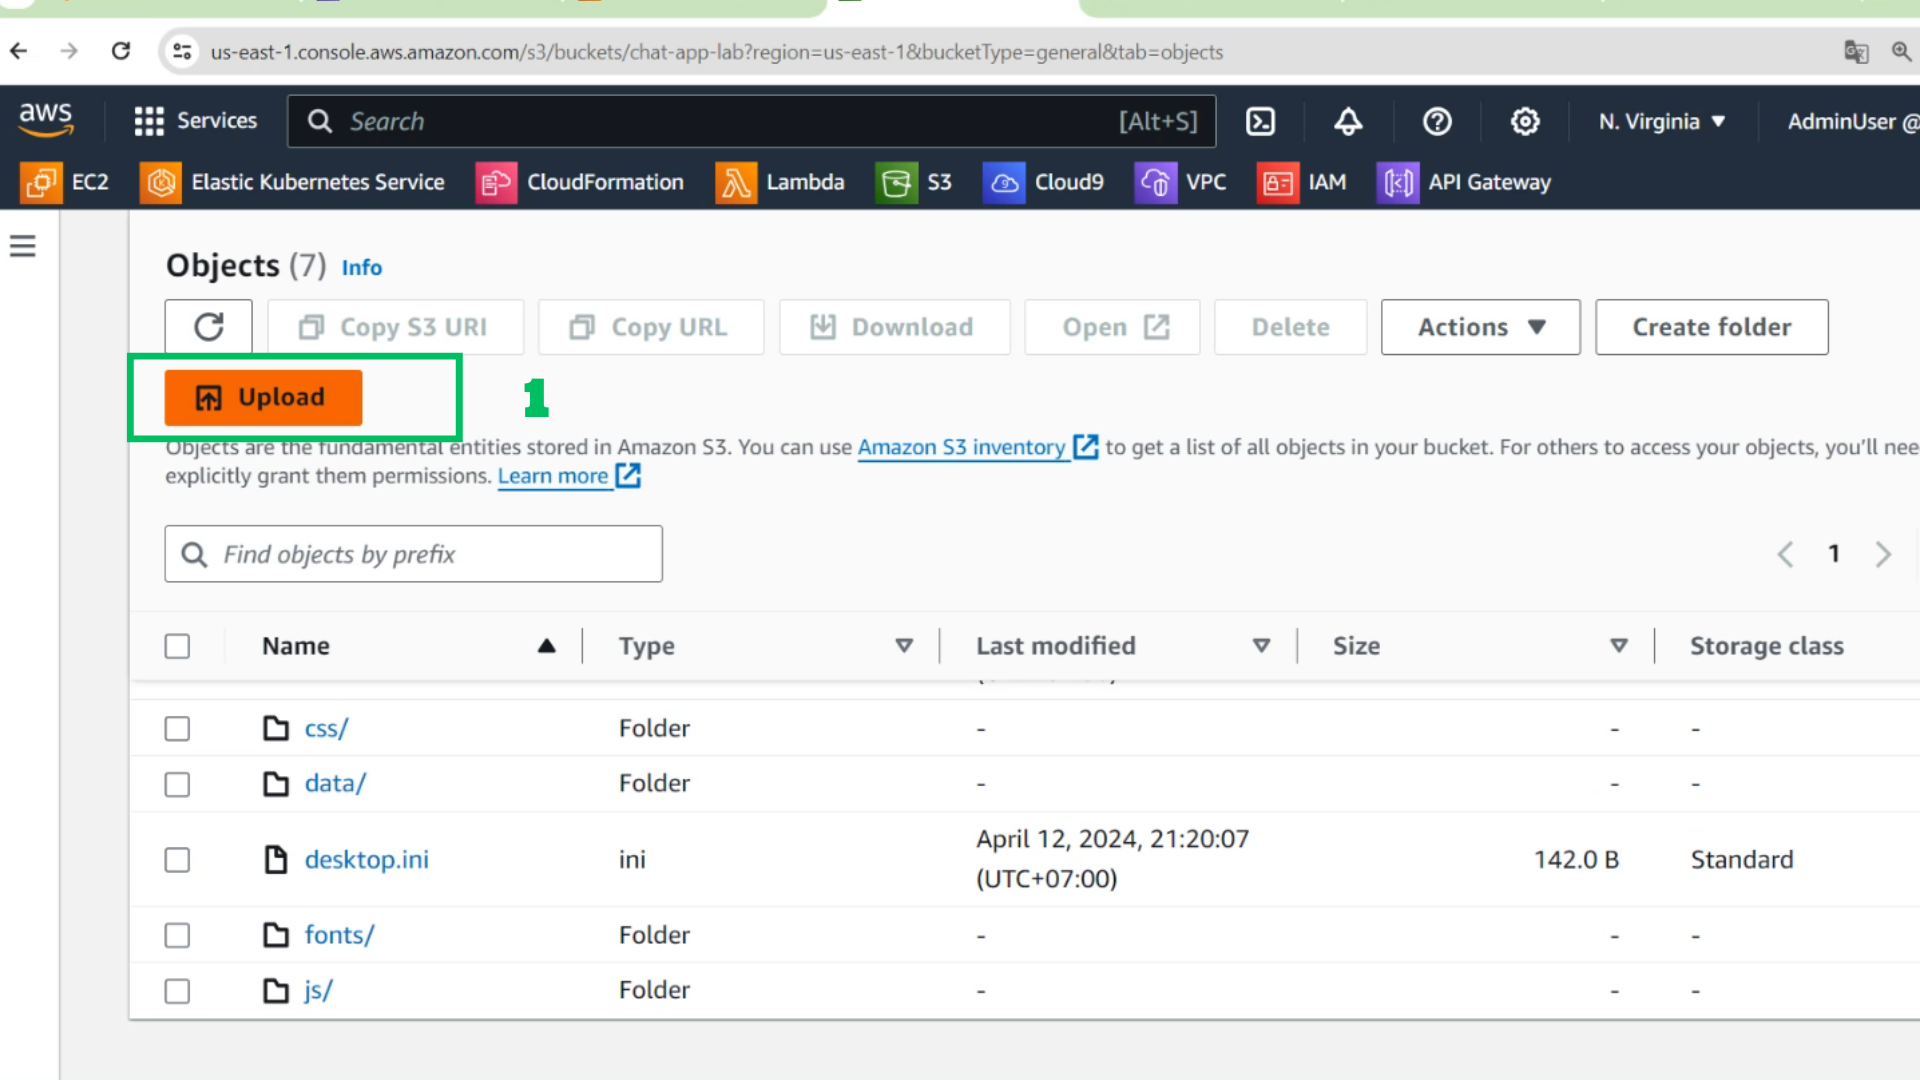
- At the S3 interface
- Choose Upload
- Choose add files

- Choose folder v3
- Drag and drop the file to the correct path s3://chat-app-lab/js/